Thursday, October 10, 2013

Awfully Chocolate Banana Cake

Youngest son's birthday was last Saturday. He had requested for a chocolate cake a week before and I promised him will bake him one. I recalled my baking friend, Vanessa, who had baked for his Fil's birthday using Yochana's recipe. I decided to go for it and challenge myself for the task.

I knew it this cake is going to be a BIG HIT in my family as I was preparing it. Secretly, I licked some choc mousse...that's how I knew it. LOL..


The cake is so rich! Yummy!


Still need to improve on my coating and decoration 


There are 3 parts to prepare before assembling them altogether. So here it goes... I have adjusted some parts for my easy reference in future. Original recipe can be found at HERE

Awfully Chocolate Banana Cake

Part 1 - Chocolate Sponge cake:


  • 4              Eggs Yolk (about 60 gm. each)
  • 100 gm  Castor Sugar
  • 120 gm  Self Raising flour
  • 1/2 tsp   Baking powder
  • 1/2 tsp   Bicarbonate of Soda
  • 50 gm     Corn oil
  • 1 tsp        Vanilla Essence
  • 4 1/2       Egg White (medium - 60gm egg)
  • 1/4 tsp    Cream of Tartar
  • 60gm       Castor Sugar


  • 30 gm. cocoa powder + 120 gm. of hot water - stir till smooth

Method:

  1. Mix egg yolks, sugar, oil, flour, baking powder, bicarbonate of soda and vanilla essence into a mixing bowl and stir with a wooden spoon.
  2. Add in cocoa mixture and stir together till smooth.
  3. Beat egg white with cream of tartar for 2 mins, then pour in sugar gradually till egg white becomes fluffy but not too stiff.
  4. Fold the egg yolk mixture into the egg white mixture. Do not overmix otherwise the egg white will be deflated and the cake will sink. If you feel that you are mixing too long and can still see traces of egg white it means that you have overbeat your egg white. Stop mixing anymore, don't worry about the egg white traces, just pour into a 9" round cake tin and bake.
  5. Bake at 175C for about 50 mins. or till cooked.
  6. Cool the cake on wire rack and then slice into 3 layers.


Part 2 : Chocolate mousse

  • 250 gm        Non-Dairy Whip Cream
  • 150 gm        Dairy whip cream
  • 1 tsp              Vanilla essence
  • 1 level Tbsp Gelatine powder - mix together with- 4 Tbsp. water and microwave for 20 secs
  • 50 gm           Cocoa Powder } mix together
  • 80 gm           Icing Sugar      }
  • 1 1/2 Tbsp    Nescafe     )
  • 1 1/2 Tbsp    Hot water ) mix together
  • 1 Tbsp "Kahlua" or "Tia Maria" coffee liquer ( I omitted)


  • 2 large ripe Del Monte Bananas - slice thickly

Method :

  1. Beat the two whip cream separately.
  2. Mix all the ingredients together.
  3. Spread 1/3 of the mousse on the first layer of sponge cake, lay the slice bananas on top and then top up with another layer or sponge, continue till the last layer of sponge is used up. 
  4. Cover the whole cake with the balance mousse and keep in the refrigerator till the mousse sets.

Part 3 : Coating for the cake

  • 35 gm. cocoa powder
  • 50 gm. sugar
  • 150 gm. Dairy whipping cream
  • 80 gm. chocolate - chopped
  • 30 gm. Butter
Method 

  1. Put all ingredients into a mixing bowl and double boil till mixture thickens.
  2. Cool before pouring onto cake.
  3. Pour the coating onto the cake and let the chocolate mixture flows down the side smoothly.
  4. Decorate the cake and put into the frige till coating sets.
  5. Slice with a warm knife and serve.

Lion's Head Meat Ball

These few days, the weather had been very hot. Today Mr Teo came back from work with nose bleeding which indicate that he has been too heaty.

So I decided to cook teochew porridge with pickled lettuce, braised peanuts, salted egg, fermented bean curd, bean sprouts and meatballs...hmm...was thinking about using tofu, fish paste or shrimps to mix with minced pork.. Finally decided for a simple and easy to make meatballs.

This is supposed to be big meatballs as my parents called it "Lion's Head Meat Balls" but I prefer to make it smaller so I shall call it "Lion Cub's Head Meatballs" instead.

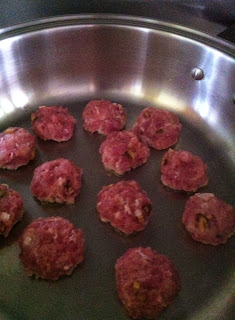
I am using my new INSPIRE Fryer by TupperwareBrands to make this dish. Love this fryer to the max as I only use 1 tbsp oil to grease the fryer before I pan fry my meatballs. 


Once done, without having to dish out the meatballs, I can just dump everything in and cover. 


Violia..the dish is done!


Lion's Head Meatballs

Ingredients A

  • 400gm minced pork
  • 1/2       egg white
  • 2-3       dry mushroom 
  • 1 tsp     ginger juice
  • 1 tsp     cooking wine
  • 1/2 tsp  sesame oil 
  • 2 tbsp   corn flour
  • 1/4 tsp  salt
  • pepper to taste

Method:

  1. Soak the mushroom till soft and chop into small bits.
  2. Mix all ingredients with minced pork until well combined and give a good massage by slapping the meat dough on the bowl.
  3. Shape them into 4-6 balls (I made into smaller balls)
  4. Set aside.

Ingredients B

  • 4 pieces Button Mushroom
  • 4 pieces Dried Mushroom (Soaked till soft)
  • 8 slices  Carrots
  • 2 cups    Chicken Stock (can replace with water)
  • 1 tsp       Corn flour
  • 1 tbsp     Light soy sauce (taste to own preference)
  • 5 leaves  Lettuce (Can replace with cabbage)

Method

  1. Heat up 1 tbsp oil in INSPIRE Fryer (3 tbsp if normal frying pan). Grease the whole pan.
  2. Put in the meatballs and cover it with open vent for 3 min in small flame. 
  3. Flip over to fry the other side of the meatballs and cover for 3 min or until golden brown on both sides. 
  4. Add in ingredients B and stir well. 
  5. Cover and simmer with close vent for 10 mins till sauce is reduced. 
  6. Dish out and serve.
PS: The original recipe calls for 15 min simmering but with INSPIRE Fryer, less oil and lesser cooking time is all it needs.

Thursday, September 26, 2013

Golden Pillow Curry Chicken Bread

I first had the Golden Pillow 金枕头 ..hmm...more than 10 years ago with my husband and my sis. We ordered online for home delivery. It claimed for 3 person share but it wasn't enough at all. Since then, I haven't had it again after we have tried...cos maybe we forgot?...it was nothing fancy then just that we were amazed by the bread wrapping up the curry chicken. Think it's best to cook our own curry chicken to eat with bread. 

Since I have learnt how to bake bread and buns now, I want to try different types so that my family can enjoy them. The memory rekindled with my baking friend Veronica from Peng Kitchen, who recently baked this golden pillow from scratch. After I get her advice, I decided to give it a kick...

I am very happy with the result using the basic straight dough recipe I googled online HERE.

You can use your own favorite bread dough recipe to make it too. I wrap the bread dough over the wrapped curry chicken instead to have a nice round shape.


CURRY CHICKEN BREAD

Ingredients:-

  • 340g bread flour
  • 50g sugar
  • 1/2 tsp salt
  • 1/2 tbsp yeast
  • 210g milk
  • 40g butter
  • Curry chicken (precooked beforehand)
  • Aluminium Foil

 Method:

Curry Chicken
  1. Make the aluminum foil into a bowl and fill in with curry chicken. 
  2. Wrap it up slowly and be careful not to tear any part of the foil to prevent spilling.
  3. You can wrap another layer of foil if needed.
  4. Set aside


Bread Dough
  1. Mix all dry ingredients in a mixer and using a dough hook mix till well combined.
  2. Add milk till dough is formed.
  3. Add softened butter and knead for 15 minutes or till dough is not sticky and pass window pane test.
  4. Fold the dough into a ball and place it in a greased container,cling wrap it and proof for 45 minutes or till it doubles its size.
  5. Remove and divide them into 3 doughs (around 180gm). Mould each into a ball again and let them rest for 15 minutes.
  6. Roll out big enough to wrap the curry chicken foil.
  7. Place the wrapped curry chicken on the flattened dough and wrap it up like a pillow. Pinch the edges tightly.
  8. Place shaped dough onto lined baking tins,cling wrap and proof for 45 minutes.
  9. Eggwash after 2nd proofing.
  10. Bake in a pre heated oven for 12-15 minutes at 160°C.
  11. Remove from baking tin immediately and cool on rack.


Monday, September 23, 2013

Steamed Egg Tofu with Prawns & Shiitake Mushroom

In my previous post, I have posted how to make homemade egg tofu .

Today, I have prepared this dish for lunch. Tofu itself is plain in taste, it needs sauce to compliment each other. Surprisingly, my kids love it and they finished the whole plate.


Steamed Egg Tofu in Homemade Sauce

Ingredients:

Homemade Egg Tofu (Recipe can be found here)
8  Prawns
2 Shiitake Mushroom
1 Broccoli (small)
1 tsp minced Garlic


Homemade Sauce

  • 1 tbsp Light Sauce
  • 1.5 tbsp Oyster Sauce
  • 1 tsp Hua Tiao Jiu (Chinese Rice Wine)
  • 1 tsp sugar
  • 80ml water
  • Potato Starch Mixture (to thicken the sauce) 

Method

1. Remove all the shells, heads and tails of the prawns, slit and devein. Set aside.

2. Wash and slice the shiitake mushrooms. Set aside

3. Cut the broccoli and cook them in a pot of boiling water. Strain and set aside. 

4. Mix all wet ingredients in a bowl except the potato starch mixture

5. Steam the tofu and serve on a plate. 

6. Sauteed the garlic, add in the mushroom and prawns. Stir fry to almost cook.

7. Add in the wet mixture and bring to a boil.

8. Add in the potato starch mixture to thicken the sauce. Switch off the fire. Can also use corn flour to make the starch mixture.

9. Plating the broccoli, prawns onto the plate of tofu. Spoon the mushroom and sauce over them. Serve while hot.

Enjoy!


Homemade Egg Tofu

I must thank my parents for being readily available to answer to my culinary questions. At any instant if I want to cook a dish but have some questions or obstacles, I can just call them for help.

One Saturday afternoon, I went to visit my parents at their stall. Their neighbor gave them two packs of soya bean as he was clearing up his stall to go back. Mum asked me to bring home to make tofu as they are unsweetened. It was quite a big pack and I have never make so much before. So I ask dad for advice and he told me that will need at least 8-9 eggs.

Immediately after I reached home, I started to prepare the tofu...

Depending on how versatile we want our tofu to be, here I am making plain egg tofu. Of course, you can add in some seasoning too to become a savory tofu.

HOMEMADE EGG TOFU (Plain)


Ingredients: 

1 regular size about 450ml Unsweetened Soya Bean
    (I bought from Mr Bean which is just nice)
4 eggs (1 use 55-60gm size) (if smaller ones please use 6 eggs)

Method:

  1. Beat eggs and add in soya bean and mix till incorporated.
  2. Strain the mixture and pour into a heat proof dish. 
  3. Using a toothpick to prick burst the bubbles. 
  4. Cover with aluminum foil 
  5. Steam over boiling water on medium low flame for about 15-20 min or until cooked. Check by inserting the toothpick to make sure it comes out clean. 

You can also line a 6" square tray with plastic sheet. Once cool, can cut into cubes for deep frying coated with cornflour. 


PS: This yields very soft tofu. If you want, can add in some seasoning into the mixture before steaming. Add in your preferred toppings and serve while hot.

Wednesday, September 18, 2013

Mother-In-Law's Birthday

Supposedly we had planned to celebrate my mother-in-law's birthday on her actual day (2nd week in September) but hubby was called up last minute on the day before for midnight work. We had to cancel our plan (to bring her out for dinner) and brought forward the celebration at home instead. We also decided to bake a strawberry cake for her ...hubby went around to get the strawberries while I bake the cake.

I used a basic sponge cake recipe, bake them in 3 pieces of 5.5" aluminum foil so that I don't have to do the level cutting for the layering. I was hesitating if a 6" cake is enough for our BIG family...

My first attempt on such frosting, trying my best to get the even frosting layers but definitely need more improvements. The frosting looks thick right but not really after all. After singing and cutting the birthday cake, the creaming was just nice for us. This is the first time ever that my hubby gave me a BIG THUMPS UP and he had two slices of it instead...which is rare. LOL... It is also the first time that we finished the whole cake with no leftovers...usually there would be some leftover in our previous birthday cakes whether store bought or home baked.


Happy Day!

Monday, September 16, 2013

Lemon Honey Chiffon Cake

Recently has a craving for chiffons but I don't have coconut milk in my pantry to bake pandan chiffon. So I went through my baking book and found this recipe using olive oil, honey and lemon which I think is healthy and soothing to the throat too.

The recipe calls for 8" chiffon tin but I decided to bake in my mini chiffon tins which I love most. First, it's baked in a shorter time, then because it's mini, the recipe can yield about 5-6 tins and it's presentable and cuter to share with friends/neighbours as a whole chiffon.


I have also learnt to unmould by hand instead of using knife to scrape through the tins. It is so so easy to do it. Try it and you will love it.


I love this recipe! With the refreshing lemon and honey aroma, this chiffon is moist & light too. Using less sugar and olive oil, this is definitely a healthy choice for the family. It gives out a lemon aroma during baking, once cooled, I keep in my tupperware. When I open the cover, I can smell the lemony aroma.


Adapted from Carol's The First Book of Baking for Beginners

Original recipe uses 8" Chiffon Tin (I use 6 mini chiffon tins instead, but can make do with 5 though)

Lemon Honey Chiffon Cake

Ingredient A:

5 Egg Yolk 
30 gm Honey
50 gm Olive Oil 
120gm Cake Flour
Lemon Zest (from 1 whole lemon) 
50ml Lemon Juice (extract from lemon)
2 tsp Cold Water

Ingredient B:

6 Egg White
1 tsp Lemon Juice
60gm Castor Sugar

Method:

  1.  Preheat oven at 160degree celcius.
  2. Sift the flour and set aside.
  3. Beat the egg yolk with honey in a mixer until light and fluffy.
  4. Add in the olive oil to incorporate well and add in the lemon zest. Mix well.
  5. Transfer to a mixing bowl if you only has one mixer. For the above steps, I use hand whisk.
  6. Add in half the sifted flour, mix, then half lemon juice, mix again and add in 1 tsp of the cold water and mix well. Repeat again with the other half  and mix into a smooth batter. 
  7. Whisk the egg white until bubbly, add in the lemon juice and sugar slowly in 2-3 portions. Whisk until stiff peak.
  8. Scoop up 1/3 of the egg white and mix into the batter until incorporated.
  9. Add in the rest of the egg white and mix well. 
  10. Pour into the chiffon tin and smoothen the top. Give the tin a few light knock to release the air bubbles trap inside.   
  11. Bake in oven for 50min. (I bake abt 30-35 min using the mini chiffon tins). Again, different oven works differently. 
  12. Once baked, immediately turn over to cool over the bottles. I don't have one so lifted up my cooling rack and use my chiffon tin to cool. 
  13. Unmould the cake only after it is completely cooled.
Happy Baking!

Do comment or share if you use this recipe. Thank you!

Wednesday, July 31, 2013

Claypot Stewed Seafood Hokkien Mee

It's been a long long time since I last had this dish in the old days. Time to reminisce so I tried to follow the recipe as close as I could still remember how it was cooked.

One pot dish is always a favorite among busy mummies, no matter you are SAHM, PTWM, FTWM, what ever terms I could think of. Even for the helpers, they would love one pot dish too.


Here's what I have adjusted the recipe based on 4 servings as I cooked based on agar-ation for my family of 7.

Claypot Stewed Seafood Hokkien Mee

Ingredients (A) 

500gm Yellow Hokkien Mee (the flat ones)
1/2 tbsp chopped Garlic

Ingredients (B)

8 Shelled Prawns (I removed the shell but left the head and tail untouched)
1 Boneless Thigh (Cut into bite-size) 
5 slices Lean Pork
5 slices Fish Fillet 
5 slices Sotong (optional)
6 pcs Crabstick
some Caixin (Cut into 4-5 cm long)

Ingredients (C) 
1 Egg  

Sauce 
500ml Chicken Stock
1 tbsp Dark Sauce
2 tsp Light Sauce
1 tsp Oyster Sauce
some sesame oil
pinch of Pepper

Thickening Glaze
3 Tbsp Tapoica Flour } Mix well for thickening
4 Tbsp Water                 } the sauce

Method:-
1) Blanch the yellow noodles in boiling water for few min, remove and set aside.
2) Dust the fish with tapioca flour and then rinse with water. Set aside.
2) Fry chopped garlic in 1 tbsp of oil till fragrant. Add the sauce, (B) ingredients and blanched yellow noodles. Cover the lid and simmer for 5 minutes.
3) Put in beaten egg and thickening glaze and a little bit sesame oil.  Stir well & serve!

PS: 
- Personally I do not like too starchy food so please add the thickening glaze according to your preference.
- My kids prefer to have poached egg or half boiled egg instead so I cooked the eggs separately and add on top before serving.
- Dusting the fish helps to remove the fishy smell and makes the fish less likely to break while cooking.


Tuesday, July 30, 2013

Lor Mai Kai


I had been wanting to make Lor Mai Kai for very long time ago, after seeing quite a few of my friends posting in their Facebook and blogs. Ingredients were anytime readily available but it's the lazy me inside which did not fulfill my craving for it.

Tonight, I decided to carry forward this long waiting to do dish for the kids' breakfast the next day before school. I have no regrets to sacrifices my rest time. Thanks Gwen for her recipe.


Assembling the Lor Mai Kai

Ingredients
1 chicken leg (thigh + drum, deboned)
4 chinese mushrooms
1 chinese sausage
3 cups glutinous rice

Seasoning for chcken
minced garlic
1 tsp sugar
1/2 tsp salt
1 tsp sesame oil
2 tsp oyster sauce
some cornstarch

Seasoning for rice
1 TBsp oyster sauce
1 TBsp light soya sauce
1/2 TBsp sesame oil
1 tsp dark soya sauce
1/2 tsp pepper
1/2 tsp salt
1/2 tsp five spice powder
1 cup water (I used water that I soaked mushrooms with and top up to 1 cup)
Mince garlic

Method (for chicken)
1.  Debone chicken leg and cut into pieces.
2.  Soak chinese mushrooms with some water and cut up (do not throw away the water)
3.  Slice chinese sausage.
4.  Marinate chicken with seasoning above for at least an hour,

Method (for rice)
1.  Soak glutinous rice for 6hrs or overnight.
2.  Mix seasoning for rice together with water. Stir well.
3.  Heat some oil in wok and fry garlic till fragrant.
4.  Add rice into wok and stir fry with garlic.
5.  Add water with seasoning into wok and mix well with rice.
6.  Keep frying till water dries up. Remove from heat.


Assembling
1.  Place some chicken, mushrooms and chinese sausage at the bottom of a bowl.
2.  Top with rice till 3/4 full.
3.  Place in wok and steam for 30 mins or until cooked.
4.  Run a butter knife around the bowl and invert onto plate. Serve while hot.


Sunday, July 28, 2013

Tteobokki - Korean Spicy Rice Cake


 Many months ago, my hubby and elder son were into Korean food and loved so much of the korean spicy rice cake - Tteobokki. Off the rack, hubby bought a few packs of the tteobokki sauce from Korea back so I went to buy the frozen korean rice cake. Although it isn't cooked from scratch, it definitely is a easy dish for first timer like me.

     This was not my first time cooking this dish but I loved this sauce. Previously bought tteobokki sauce (not this brand) from NTUC but the taste wasn't good enough for my fussy hubby. I will strongly recommend this sauce if you ever go Korea to their supermarket.  

Homeplus Brand - Instant Tteobokki Sauce


Tteobokki with added homemade kimchi
Tteobokki by Eleanor


Ingredients :

1 packet Tteobokki sauce (store bought, most of them are 150gm, slightly more is fine)
500gm Korean Rice Cake
3 small Fish cake, cut in bite size
1 carrot, diagonally sliced abt 1cm thickness (optional)
1/2 pack Crabstick (optional)
1/2 pack
1/2  Onion, sliced
2 stalk spring onion, cut into 3-4 cm strips
2-3cups Water (just enough to cover the rice cake)
Toasted Sesame seeds (for garnishing)

Method:

1) Heat up the frying pan or wok over medium flame, pour some oil and fry the onion til fragrant, no need until brown.
2) Add in water to boil, then add in the rice cakes to simmer for 8-10 min or until soft. Constantly stirring the rice cake to prevent it from sticking onto the base.
3) Add in the tteobokki sauce to mix well.
4) Add carrot, crabstick and fish cakes. Continue to boil, stirring constantly, for an additional 8-10 minutes or until the sauce thickens. The sauce should be sticky and thick, if still watery, boil for a while longer. Add in the spring onion to mix well and sprinkle the roasted sesame seeds right before turning the heat off. Serve immediately. 


Note:

Tteokbokki does not reheat well in the microwave. Reheat any leftovers, along with a little bit of broth or water, in a small pan over low heat. You can also add in cabbages or hard boiled eggs.       


Tuesday, July 23, 2013

Easy Kimchi

Easy Kimchi


I am back now to blog again as I have come to realize that blogging will bring back memories of how and what I have learnt over the years. I have missed so much that I couldn't find back some of the good recipes I have come across.

I have learnt how to make kimchi for the first time from  Maangchi  but modified a little to my own taste.

Kimchi by Eleanor's Kitchen

Easy Kimchi 

Ingredients :-

1 whole Napa Cabbage (abt 1.6kg)
4 pcs of garlic
A few slices of ginger
1 big onion
2 pear
3-4 Spring onion (diagonally sliced)
1 Carrot (cut to strips)
Hot Pepper Flakes (buy fm Korean shop) put to yr own spicy level
170 gm Rice Flour
1 cup of water
85 gm sugar

Method:-

1. Trim the discolored outer leaves of the napa cabbage.

2. Cut the cabbage lengthwise into quarters and remove the cores. Cut the cabbage into bite size pieces.

3. Soak the cabbage in cold water and put the soaked cabbage into a large basin. Sprinkle salt.
(Tips: 1 cup of salt will be used for 10 pounds of cabbage) I used about half a cup of salt.

4. Every 30 minutes, turn the cabbage over to salt evenly ( total salting time will be 1.5 hours).

5. One and a half hour later, rinse the cabbage in cold water 3 times to clean it thoroughly.

6. Drain the cabbage and squeeze out the water.  Leave aside.

7. Put the cups of water, rice flour in a pot and mix it well and bring to boil. Keep stirring until the porridge makes bubbles (about 5 minutes).

8. Add in sugar and stir to cook for a few more minutes until it is translucent. Cool it down.

Making the kimchi paste:


1. De skin and cut up the pear, removing the seeds.

2. Cut the onion into chunks size.

3. Blend the garlic, ginger, pears into fine puree.

4. Place the puree into a large bowl, add in the cooled porridge, hot pepper flakes (I used 1.5 cups) and fish sauce, mix well to taste.

5. Add in the cabbage, spring onion and carrot. Mix well till incorporated (I wore disposable gloves and mix by hand). Kimchi is done.

6. Put the kimchi into an air tight container n cover. Leave at room temp to ferment for 12 to 20 hrs. Then refrigerate. When you open the lid, you may see some bubbles with liquids or maybe sour smells, that means it is already being fermented.

Mini Corn Dog Muffins

A baking friend, Gwen, introduced us (my daughter and I) to mini corn dog at a gathering. My daughter loved it and had quite a couple of it. Since then, she had been requesting me to bake for her. I have been dragging my feet as I still have a long baking list to fulfill and the need to buy cornmeal from phono huat too.

Finally, I have all the ingredients needed. The original recipe is adapted from here, shared by many lovely people.


So here's the recipe ...

Mini Corn Dog Muffins


Ingredients:-


1/2 cup Melted Butter 
1/2 cup Sugar
2 Eggs
1 cup Buttermilk 
1/2 tsp baking soda
1 cup Cornmeal
1 cup Plain Flour
1/2 tsp Salt
8-10 hotdogs (Cut into 3 pieces)

Method:


1. Combine baking soda, cornmeal, flour and salt in a large bowl.
2. Combine butter and sugar with whisk
3. Add eggs and whisk to combine.
4. Add buttermilk and whisk well.
5. Add in dry ingredients into wet ingredients and mix well.
6. Drop 1 tbsp batter into mini muffin tray. (I use the mini paper cup into mini tart mould) 
7. Place 1 hotdog into the middle of the batter and press down.
8. Bake at 190 degree C for 8-12 mins.

(Just for fun, I made 3 cuts on top of the hotdog so that it opened up like a flower when baked)


Kueh Dadar

Since I still left some Gula Melaka and happened to see my friend, Rosalyn, sharing her kueh dadar recipe, I decided to clear the pantry and try making this kueh kueh (actually to find excuses to stock up more gula melaka, hahaha).

The recipe calls for 80g Gula Melaka but I find it can be slightly more so I modified a bit.

Kueh Dadar Recipe:-

Ingredients for the fillings

- 200 gm Grated Coconut
- 80g Gula Melaka (I use 90gm)
- 1/3 tsp Salt
- 2 Pandan Leaves
- 40ml Water
- 1 tbsp Glutinuous Rice Flour

Method-

1) Melt Gula Melaka, water and pandan leaves in a pan, till sugar dissolved. Remove the leaves.
2) Add in grated coconut and salt, mix well.
3) Lastly, add in the glutinous rice flour, mix everything well till incorporated.
4) Set aside for later use.

Ingredients for Batter

- 180gm Plain Flour
- 2 Eggs
- 1/2 Salt
- 2 tbsp Pandan Juice (1-2 drops of pandan paste)
- 250ml Water
- 100ml Coconut Milk

Method:-
1) Mix all ingredients in a bowl, sift and leave aside for 30mins.
2) Heat a non stick pan over medium heat, add 1 tsp oil and wipe off excess with paper napkin.
3) Pour just enough batter thinly covering the base of pan, swirl round the pan to spread the batter evenly.
4) Turn over the pancake after a minute, remove onto a plate to cool.
5) Put about a tbsp or more of the coconut fillings onto the pancake and roll up.
6) Enjoy!


Kueh Dadar


Friday, July 19, 2013

Cocoa Bread

2 days ago, I decided to try out the recipe from the baking books I have collected as I always make use of the same basic dough for my different designs of buns/loaf. I hand knead all my bread dough as I don't own a BM.

So, here comes the cocoa bread! I would say this dough is very sticky to handle but it yields a soft bread. Can eat on its own or goes very well with ice cream or spread with jams.

Cocoa Bread
(Recipe adapted from Home baking 星期天的烘焙时光)

Ingredients:

235 gm bread flour
15 gm cocoa powder
5 gm yeast
45 gm sugar
1 egg (50gm)
120 gm milk
30 gm unsalted butter
4 gm salt

Method

1) Place the dry ingredients and stir together. (Yeast must not be placed in direct contact with salt as it will 'kill' the yeast and become inactive)

2) Add in the wet ingredients (egg & milk)

3) Mix together and pour out onto tabletop to knead by hand for abt 8 min. Add in butter and knead again for another 10min or until the dough is smooth and elastic. 

4) Oil bowl and put in the dough, cover with cling wrap and leave to proof for an hour or till doubled in size.

5) Punch out the air and divide into 3 portions. Each rolled into a ball, cover and let it rest for 15 min.

6) At the same time, grease the loaf pan (20cm*10cm). Here I use pullman tin.

7) Flatten out the dough into rectangular shape, fold in both sides and roll into a load, pinch the edges tightly. Repeat for the other 2 dough. (See last photo below)

8) Place the 3 rolled dough side by side, with the closing ends facing down. 2nd proofing for  an hour or doubled in size.

9) Egg wash and bake at 180C preheated oven for 25-30mins.

Enjoy Baking!